
Soil Recipe by Sarah Cheng
Ask your children or grandchildren an easy question: What do plants need to grow?
The simple answer is light, air, water and soil (or nutrients to be technical). When starting seeds (and it’s not too late this year!) in the past I’ve focused on light and water, and have used whatever generic mix I have on hand for starting seeds.
I recently read an article in the Floret newsletter by Erin Benzakein, of Floret Flower Farm in Skagit Valley. If you haven’t signed up for her newsletter or visited the website, it’s a great source of plant information. Erin’s article regarding a potting soil test to find the perfect recipe for propagation caught my attention.
Adding more nutrients to a planting mix makes a difference in the quality of the seedlings produced. This becomes more noticeable as growth progresses. Most seeds begin with built-in nutrition. If you’ve been to an SBGS seed event, here is our definition of a seed, with thanks to Carol Baskin, University of Kentucky professor: A seed is a baby plant (embryo) in a box (seed coat) with its lunch (nutritive tissue). I highly recommend the book Seeds by Thor Hanson, a local author, for more entertaining details on amazing seed stories.
After the “lunch” runs out, the baby needs nutrients gathered from the soil to continue a healthy life. And that’s where the improved recipe comes in. If you’ll be planting seedlings into the garden within a month, it may not be worth the investment. But if you’re growing for a longer period of time (moving to larger pots to grow onward) or for fantastic containers this summer, for plants described as “prefers nutrient rich soil”, consider using the recipe below for propagation.
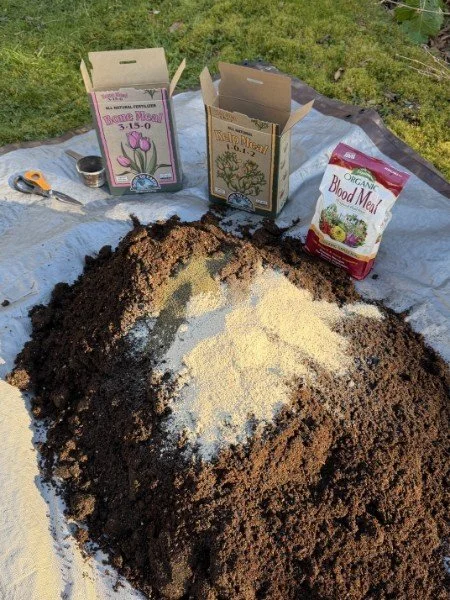
After viewing Erin’s video, I wanted to verify that her experiment was repeatable in my made-over dining room “greenhouse”. (Blessings upon my patient husband.) I down-sized her recipe to the following:
• 2 cubic feet of G&B Organic Potting Soil
• 2 ½ gallons (half a bucket) of G&B Purely Compost
• 3 cups bonemeal
• 1 ½ cups kelp
• 1 cup blood meal
For a one-stop source, check out the garden section at the Grange in Issaquah. All ingredients were dumped onto a large tarp (a wheel barrow would also work) and thoroughly mixed.
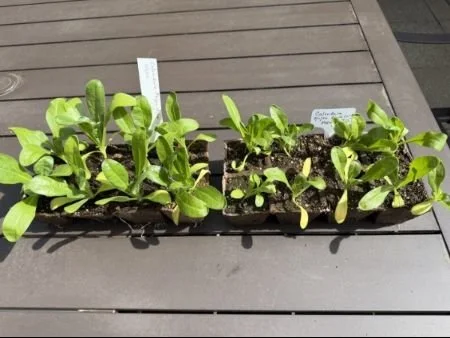
On March 2nd I started a flat of calendula from seed, destined for the Heritage Garden this spring. Half the seeds (16 2” cells) were planted with the recipe above and the second half (16 cells) with another recommended seed starting mix - Black Gold Natural & Organic Seedling Mix by sungro.
The results? I’m a believer! I’m guessing as the seedlings mature the differences will be more noticeable. But as I write this, my adjusted recipe above wins the day, with fatter, broader leaves, earlier second sets of leaves, taller plants, sturdier main stems and roots already pushing out the bottom of the cell.
The added expense will deepen the shade of your green thumb and your plants will thank you. If you’re experimenting, let us know your results. Happy gardening.